
Requirements :
- Waste canvas*, or soluble canvas* (I use waste in this tutorial but talk about soluble too)
- Clothing to stitch onto
- An embroidery hoop
- Embroidery thread (go with a high-quality thread so the colours don’t run. DMC threads are colourfast)
- A size 26 tapestry needle
- Embroidery scissors
You may also want to use some fabric stabiliser for your clothes depending on the pattern's size you are stitching. As mine was quite a small cross stitch pattern I decided not to use any. If your pattern is large a stabiliser might help you.
Fabric stabiliser will make sure your clothes stay put while you are stitching on them and make your clothes a little stiffer which makes them easier to stitch on.

So let’s dive into how to stitch now! As I said before, you can use waste canvas or soluble for this project. I used waste canvas because I don’t like the residue that can be left behind from soluble, but as we are stitching on clothes the residue will eventually be washed off anyway.
There are some few steps that will be different for waste and soluble canvas but I will tell you what to do for each if it is different.
Step 1: Cut your canvas
No 1, you need to cut your waste canvas bigger than what your pattern is. You can just cut it 1 square larger than your pattern so you can place it more accurately or cut it much larger like I did to give yourself a good margin.

Step 2: Place your canvas on to your clothes
Now you need to line up your canvas where you want it on your clothes. If you have cut your canvas close to the size of your pattern then you can place it exactly where you want your cross stitch to be.
But if you have cut it a little larger then you need to think about where you want to start stitching. If you are starting in the centre then line up the centre of your canvas with where you want to centre of your cross stitch to be on your clothes.
Although I usually start in the centre for other types of cross stitching, when I’m stitching on clothes I start at the top. So for this, you need to line up the top of your canvas where you want the top of your cross stitch to start (remembering to give yourself a little margin (around 1 – 2 squares).

Step 3: Baste your canvas on to your clothes
To baste your canvas on just use a loose running stitch around the edge of your canvas. Don’t pull too tight as this will distort your clothes underneath. And make sure you are only going through one layer of your clothes; you don’t want to stitch the front and back together here! (Speaking from experience here).

As my cross stitch pattern was so small I decided to just use basting threads across the top and bottom, but if you have a larger pattern then go all the way around.
You will be pulling these threads out later so don’t secure them too tightly either. I just used a small back stitch to secure my threads at the end.

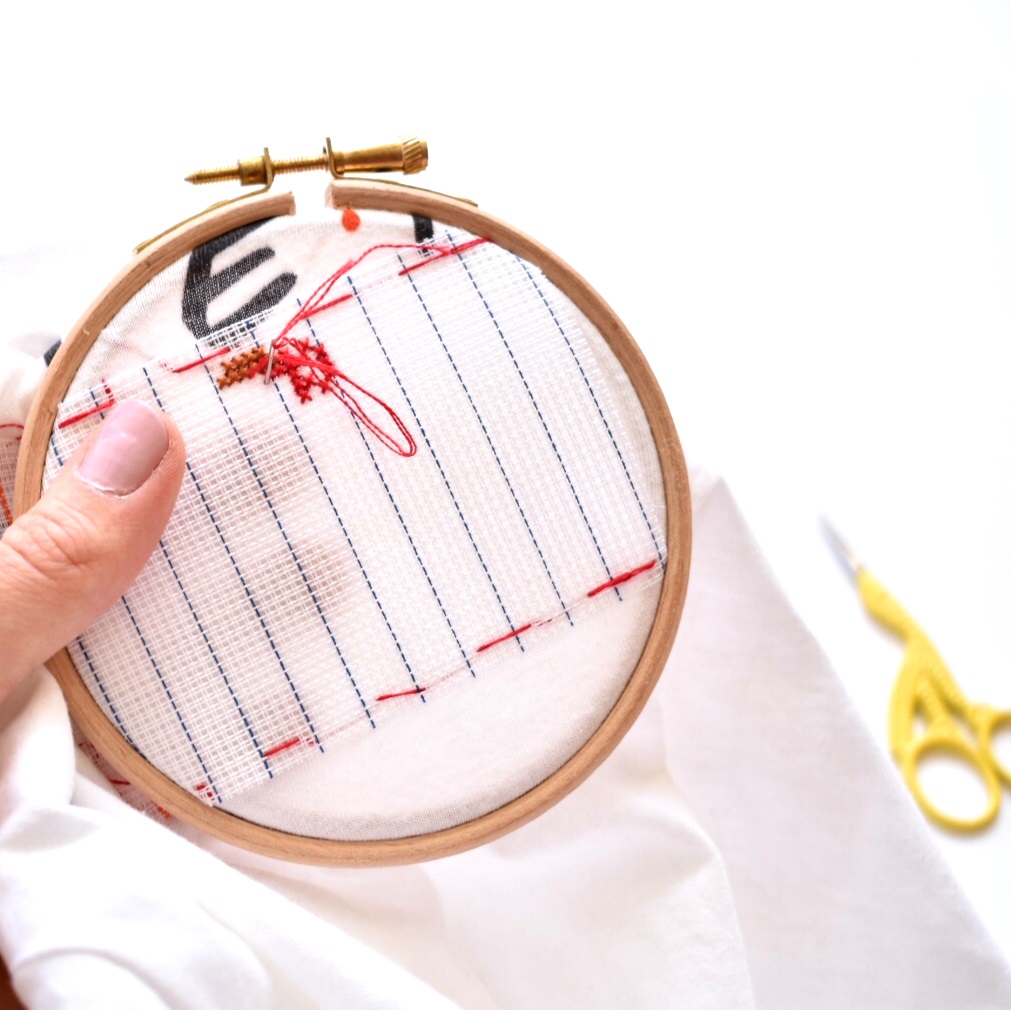
Step 4: Start cross stitching!
Now the fun part; stitch your design on!
I said to use a size 26 needle for cross stitching on clothes. This is because the needle will leave less of a prominent hole on your clothes and if you are using soluble canvas the needle passes more easily through the holes on it.
Some tips for stitching:
- Use an embroidery hoop. I tried at first not using one but it is so so much easier to use a hoop (or a Q-snap if you prefer them). Just be careful when pulling your fabric; make it taught enough to stitch through, but not so tight that you have distorted the clothes.
- When making your stitches be sure not to stitch through any of the canvas threads in the waste canvas. One of the benefits of the soluble canvas is that you won’t be able to stitch through it. Well, you could, but it wouldn’t be accidental as it’s so tough to stitch through. And if you did it’s not really a problem.
- Just like with the basting threads, be sure to only be stitching through one layer of your clothes.
- Take your time. Stitching on canvas is more difficult than on aida or evenweave. For starters, you are making your own holes so this can make your stitches a little uneven. Don’t aim for perfection or you will never finish but don’t rush it and have a project you’re unhappy with.
- When tying off at the back you might want to secure it a little more than you would for normal cross stitch projects because clothes will be handled so much more. I didn’t do this for this tutorial as it’s something I thought of after (I will add photo updates when I do my next part), but you can just tie a knot after coming under some stitches at the back.

Step 5: Take it all off!
Once your cross stitch is finished you need to take off your hoop and take out your basting threads. To take these out snip off where the threads are secured (probably at the start and end) and then they should just pull out.

Step 6: Cut your canvas
If your canvas is much larger than your cross stitch then you need to cut it down a bit. Cut it so it has around 1-2 squares around the edge; you want enough thread to grab onto to pull them out.
For soluble canvas it doesn’t matter too much about leaving this margin around the edge; you can cut as close as you can get without snipping your threads.

Step 7: Take the canvas away
For waste canvas, you need to pull the threads away. The actual instructions say to wet it first but I find it just as easy to do it dry and then there isn’t the problem of any residue being left behind like there is with soluble.
First, take away the threads from around the edge. You can use tweezers or your fingers to pull the threads out. I used my fingers because the threads were short, but for longer ones, you will probably be better with tweezers.

You should just be able to pull these threads away. For the threads that are under your cross stitch, you want to pull them in the direction that they are woven.
So for vertical threads pull them up or down while holding the cross stitch part in your other hand. For the horizontal threads pull them left or right, again holding the cross stitch while pulling.
I recommend working your way from the outside into the middle. So instead of pulling all the horizontal threads out then all the vertical, start with a vertical on the left, then a horizontal on the top, then a vertical on the right and a horizontal on the bottom and repeat.

Some threads might be more difficult to remove than others but gentle tugs should get them out.
If one really won’t budge then you may have stitched through it. If this happens then you will want to snip the waste canvas as close to the edge of your cross stitch as you can get and see if you can hide it. Or you could try pulling it under each individual “X” until you hit the one where it is stuck and snip the thread there.
For soluble canvas, you just simple wet the canvas and it will disappear. Run it under water to try and remove as much as the residue as you can.
And you’re done! This is just the start of my Friends t-shirt project, so it looks a little odd right now. But soon it will be full of mini cross stitch motifs and I will pop back and update this post when it’s finished!
Comments
Post a Comment